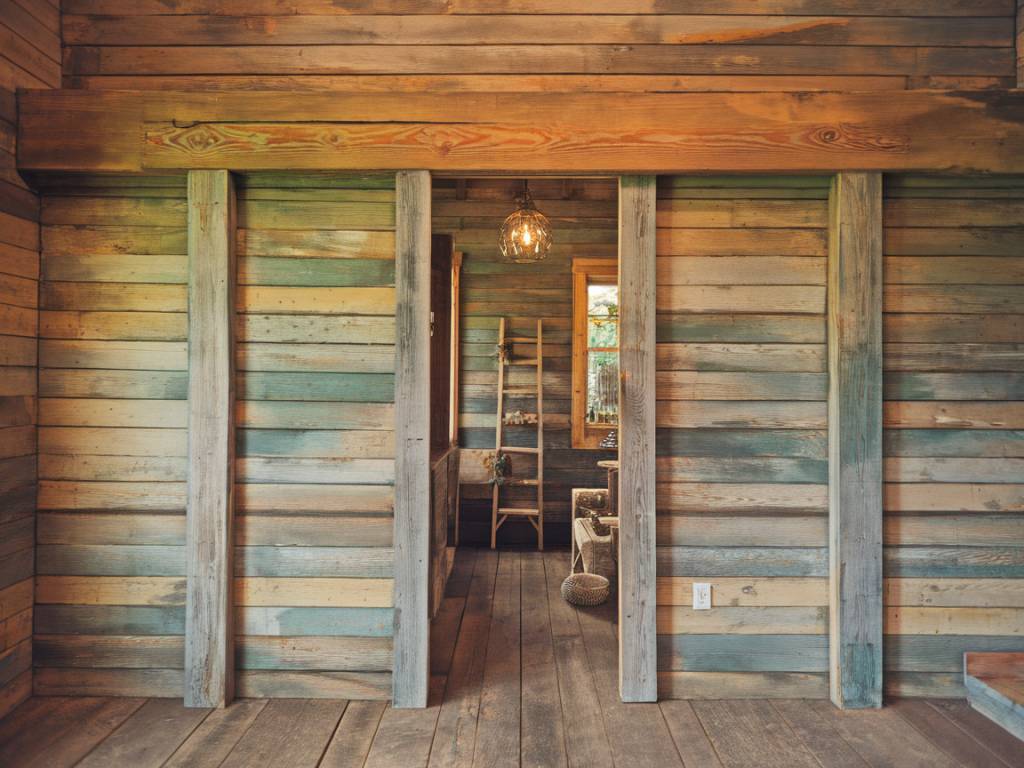
Discovering the Charm of Shiplap Walls
Do you ever walk into a room and feel an immediate sense of warmth and history? That’s the magic of shiplap walls—they envelop a space with a rustic charm that’s both timeless and inviting. Shiplap, originally used in the construction of ships (hence the name), finds its way into the heart of our homes, reminiscent of cozy cottages and serene countryside retreats.
In this guide, we’ll explore everything shiplap, from understanding its roots to mastering a DIY installation. With each step, visualize your home transforming into a haven that speaks to the soul. Are you ready to dive into the world of shiplap walls?
The Story Behind Shiplap
Before chronicling your journey to a shiplap wonderland, let’s briefly pause to appreciate its heritage. Originating from coastal dwellings and later popularized by farmhouse styles, shiplap boards were traditionally used for exterior applications due to their sturdy and overlapping construction.
Over time, these unassuming wooden planks have transitioned indoors, becoming synonymous with rustic elegance. Their popularity leapt into homes around the world, celebrated for their textured beauty and the visual interest they impart on otherwise plain walls.
Choosing the Right Shiplap for Your Home
Embarking on a DIY project starts with choosing the perfect material. Here are some options to consider:
- Real Wood: The authentic charm of real wood shiplap is unmatched. It brings in natural grain patterns and warmth, though it can be pricier and requires more maintenance.
- Plywood: A budget-friendly alternative, plywood can mimic the look of real wood shiplap when painted or stained.
- MDF: Medium-density fiberboard is another cost-effective solution, especially when seeking a smooth, painted finish.
Each material brings its unique benefits, contributing to the storytelling aura of your home. So, which option resonates with you?
Tools and Materials: Gathering Your Arsenal
Before jumping into the installation, gather the necessary tools to ensure a smooth process:
- Measuring tape
- Level
- Stud finder
- Saw (circular or hand saw)
- Nail gun and nails
- Paint or stain, if desired
- Protective gear (gloves, goggles)
With these tools at hand, you’re all set to turn walls into storytellers, echoing tales of rustic grandeur.
Step-by-step DIY: Crafting Your Rustic Retreat
Now comes the exciting part—bringing your vision to life. Follow these steps to install shiplap walls:
Preparation
Start by prepping your wall. Use a stud finder to locate and mark the studs on the wall—this is crucial for securely nailing the boards. Next, measure your wall’s height and width to calculate the number of boards required.
Cutting the Boards
With measurements in hand, use a saw to cut your shiplap to the desired lengths. Remember, accuracy is key to ensuring a seamless fit.
Installing the Shiplap
Begin at the bottom of the wall and work your way up. Use a level to position the first board perfectly straight, then nail it into the studs. Continue this process, leaving a small gap between each board to allow for natural expansion and contraction.
Finishing Touches
Once all boards are in place, you can paint or stain your shiplap to match your desired aesthetic. Whether you opt for a modern white look or maintain the wood’s natural hues, each choice weaves a different narrative.
Embracing the Imperfections: The Beauty of Rustic Style
As you step back and admire your handiwork, remember that the allure of shiplap lies in its imperfections. Those knots, grooves, and variations? They’re the whispers of craftsmanship, adding character and warmth to your home.
Do you feel it yet? That connection between your living space and your personal story? Shiplap has the power to transform ordinary walls into canvases of emotion and expression.
Bringing Shiplap Beyond the Walls
Shiplap isn’t confined to just walls. Consider extending its rustic elegance to other areas:
- Ceilings: Create a captivating focal point by applying shiplap to ceilings, drawing eyes upwards to appreciate the craftsmanship.
- Kitchen Islands: Add texture and depth to your kitchen by cladding the island base with shiplap.
- Accent Pieces: Infuse charm with shiplap headboards, shelves, or even furniture pieces.
Each implementation enhances your home’s narrative, blending functionality with artistry.
The Final Flourish: Personal Touches
Finally, the beauty of shiplap is magnified with the addition of personal elements. Decorate your newly shiplapped walls with cherished art pieces or family photos. Introduce textures with soft furnishings that echo the warm, inviting theme. Every layer added is a piece of your home’s evolving story.
As the day draws to a close, imagine residing in your renovated space. Feel the gentle embrace of rustic charm in every corner, reflecting not just the spirit of your design, but the heart of your home. This journey with shiplap is more than just a decorative pursuit—it’s a soulful revelation of what home truly means.


